
Beef Empanadas & Orange Aquachile Recipes

By: Tristan Guilbeault
Instagram: @tristangcooks
Every country in Latin America has their version of an empanada. Empanadas are a form of hand pie that are baked or deep fried and can be found with a myriad of sweet and savoury fillings. This recipe takes inspiration from Argentinian and Chilean varieties of Empanadas using a non-yeasted flaky dough and a beef filling. I have put my Amaranth spin on it by using local grass-fed beef, potatoes, zante currants and red fife flour from Scottish Mills. This recipe is great for freezing or packing in your child’s lunch box to warm up at school!
Empanadas have a long history of migration. Beginning in the Middle East, hand-pies evolved and were passed on to Europeans. It was the Galicians who brought them to Latin America. These large hand pies had square or rectangular shapes and a yeasted dough with fillings such as tuna, whitefish or chicken. Over time they evolved and dropped the yeast, were made smaller and the dough began to be made from whatever flour was on hand, including cassava and corn flour. The fillings changed too; depending on the terrain, local spices and ingredients. Empanadas with wild mushrooms, peanuts, potatoes, steak, pork and a variety of seafood emerged. Empanadas can be eaten at all times of the day and are generally seen as a snack. They are to be eaten with your hands and are best right out of the oven! Just be cautious as that filling will be hot, hot, hot!


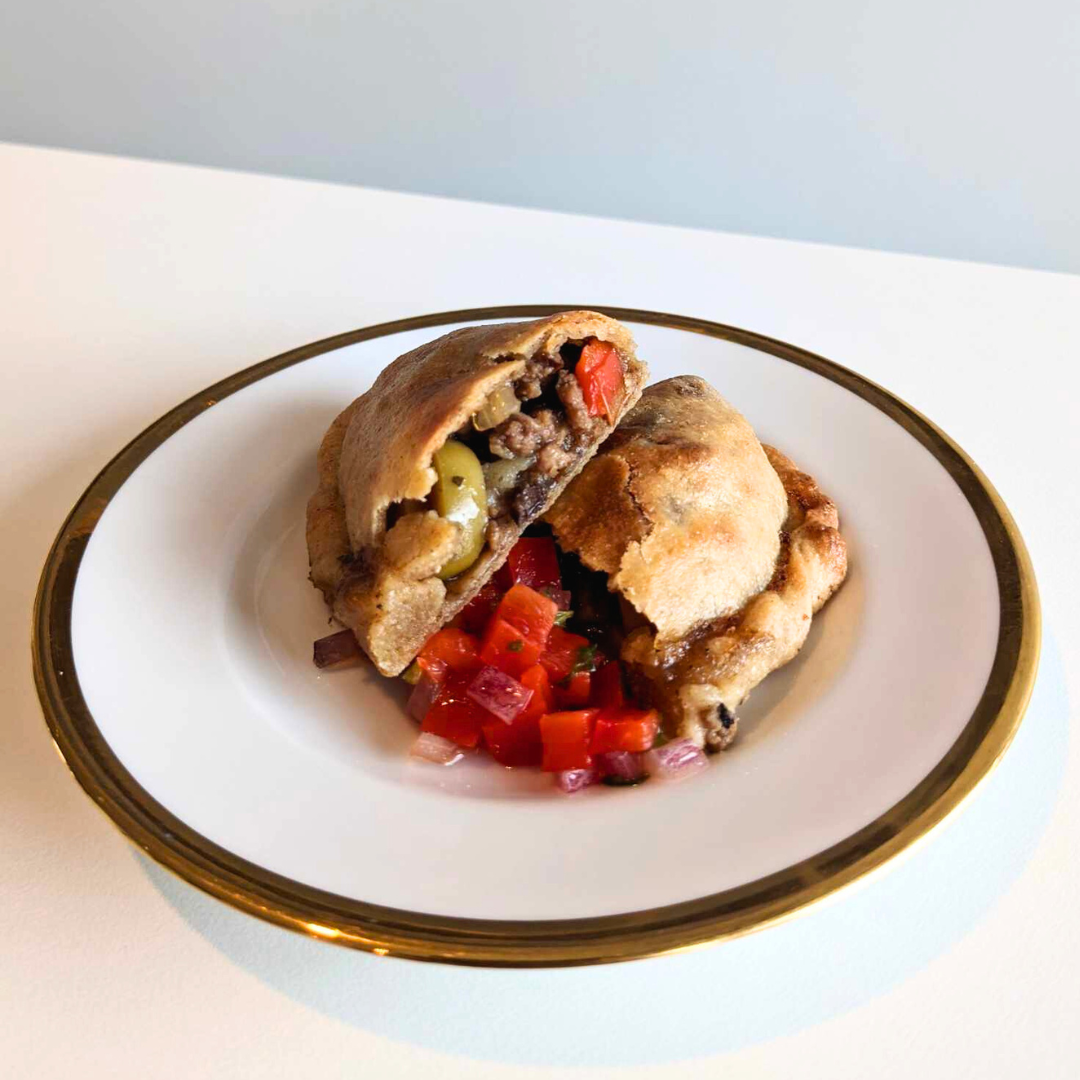
Beef Empanadas
Recipe from Tristan Guilbeault
Dietary restrictions: Nut-free, lactose-free, can be made vegetarian
Total Time: 3 hours 15 min | (Preparation): 1 hour hands-off, 1 hour hands-on | (Cooking): 1 hour 15 min
Yields: 24 medium-sized empanadas
Ingredients
Ground Beef Mix
● 1lb Ground Beef (we recommend Gemstone Grass Fed Beef and Top Grass)
● 2 tbsp High-Vibe Health Beef Tallow or Olive Oil
● 1 medium yellow or red Potato, peeled and cut into small dice
● 1 white or yellow Onion, finely diced
● 1 red Bell Pepper, diced
● 1⁄3 cup dried Zante Currants, Sultana Raisins or Thompson Raisins
● 2 cups (450g) Beef Broth (we recommend Pacific Foods, The Gut Lab, Bo & Marrow and High-Vibe Health)
● 3 Garlic cloves, minced
● 2 tsp whole or ground Cumin
● 1 tsp Paprika
● 1 package Angela’s Olives (preferred variety), cut into slices
● 2 tsp Salt
Slurry
● 2 tbsp Arrowroot Powder (we recommend Westpoint Naturals, or our Bulk Section)
● 2 tbsp Water
Red Fife Dough
● 4 cups Scottish Mills Red Fife Flour (500g), plus extra for dusting
● 14 tbsps (200g) Cold Butter, cubed (we recommend St. Brigids Creamery, Rolling Meadow, Organic Meadow and L’Ancetre)
● 1 1⁄2 tsp Salt
● 2 Eggs
● 3⁄4 cup Water
● 2 tbsp Sugar
Egg Wash
● 1 Egg, whisked
● 2 tbsp Water
Ground Beef - Instructions
Prep Time: 5 minutes, 1 hour to cool | Cook Time: 45 minutes
1. Begin by making the ground beef mix. Mince the garlic, onions, peppers; chop the potatoes and set aside. Set a medium-sized pot on medium heat. Add beef tallow or olive oil, then onions and garlic, saute until translucent around 5 minutes. Add the cumin, paprika and 1 teaspoon salt. Then add the diced red peppers, saute for another 5 minutes and add the ground beef. Reduce the heat to medium-low and break up the ground beef as it cooks using a wooden spoon. Once the ground beef is partially cooked, add the potatoes, beef broth, and 2 teaspoons of salt. Let this mixture simmer for 30 minutes, stirring occasionally.
2. After 30 minutes, the cubed potatoes should be cooked, the beef broken up and the broth reduced by half. At this point, the burner may be turned off and the currants added. Make the arrowroot slurry by mixing water and arrowroot until smooth. Add to the pot and mix. Season to taste and set aside in the fridge to cool down.
Red Fife Dough - Instructions
Prep Time: 10 minutes to make the dough, 1 hour rest
1. Measure out the ingredients and dice the cold butter into cubes.
2. Mix flour, sugar and salt in a large bowl. Add the cold butter and mix with hands, breaking up the butter into smaller pieces, the dough should begin to look shaggy. Mix the two eggs and water in another bowl and whisk until smooth. Make a well in the flour mix and add in the egg mix, slowly incorporating. Once the dough has come together, transfer to a floured work surface and knead the dough for 3-5 minutes, or until it is smooth (ensure not to overwork). Wrap the dough in a plastic bag or cling film and then set in the fridge for 1 hour.
Empanadas - Instructions
Prep Time: 30 minutes | Cook Time: 30 minutes
1. Once both the dough and filling are made and cooled, it is time to make the Empanadas.
2. Using a floured work surface divide the dough in half and use a rolling pin to roll it out until it is 1⁄4 inch thick or less. Using a 5-in ring mold or bowl, dip into some flour then punch out circles from the rolled dough. Set them aside. Continue with the other half of the dough. Once all the holes possible are punched out there will be some scrap dough left behind, this may be re-rolled until no more cut-outs can be made. If your kitchen is warm or you want to get ahead these cut-outs may be put in the fridge for up to three days or frozen for up to 6 months.
3. Set the dough circles on the counter, using your palms spread the dough until it is nice and even (do not make it too thin, we do not want any holes or to be able to see the counter through). Add 2 tablespoons of filling to the center of each empanada followed by two slices of olives. Get a bowl of water and dip your finger into it, trace the outside of the dough so the dough may stick to itself. Now fold the dough over onto itself, pinching the two sides together with your fingers, ensuring the edge is completely sealed. Next, the edge may be braided to create the traditional empanada shape, pinch the dough between your thumb and index finger, pull the dough and then fold, pinching once again into another fold, once you get to the end, pinch and pull the dough underneath to create the “foot.” I have a video of this down below. Alternatively, they may be sealed with a fork for easier execution. Continue with the rest of the folding and set onto a sheet pan with parchment paper.
4. Set the oven to 350 degrees. Make the egg wash and brush the empanadas with it. Add to the oven and bake for 25 minutes. Once cooked, put under a low broil for 3-4 minutes until the empanadas are a beautiful golden brown. Let them cool down slightly and serve!
TIPS
These Empanadas are easy to make but take some time. To make this easier the dough may be stored in the fridge for up to three days and the dough cut-outs may be frozen for 6 months or longer. The filling may be stored in the fridge for up to 14 days. When making the filling the ratio of broth to filling must be correct for juicy empanadas. The broth should have reduced to about 1⁄2 an inch over the rest of the ingredients. If the liquid has reduced too much add some more water, if it has not reduced enough cook for another 5-10 minutes. When seasoning the beef mix, do not add too much salt as it will be paired with salty olives later on. To measure the correct amount of butter for the dough use the line present on the packaging, if it does not have one a scale may be used.


VEGETARIAN
Vegetarian varieties of Empanadas are quite popular in Latin America. To make my version vegetarian, simply substitute the ground beef mix with your favourite variety of mushrooms carried at Amaranth! My preference would be the local, Calgary grown Trafford Farms Oyster Mushrooms or Lions Mane. Their neutral flavour along with subtle hints of umami will provide for a unique flavourful empanada. Follow this recipe, roughly chop the mushrooms, use olive oil instead of beef tallow and substitute vegetable broth instead of beef broth.


REHEATING
Empanadas are great because they are a labour of love. They may take some time to prepare but once made they may be frozen and reheated anytime time of the year. To freeze empanadas, place them on a sheet pan in the freezer, once frozen they may be stored in a bag for up to 6 months. When they need to be cooked set on a sheet pan with parchment, brush with egg wash and bake for 40 minutes at 350 degrees. To reheat these empanadas bake at 400 for 20 minutes or until they are heated through. For children taking these to school, microwave for 30 seconds for an easy delicious lunch or snack.
Aquachile is a traditional dish hailing from Sinola, Mexico. The name translates to chile water and describes the process of marinating shrimp with limes until cooked. Served with cucumber, cilantro, avocado and chilis. I have put my own twist on the classic using these beautiful oranges from Amaranth which add not only a beautiful colour but a lovely sweetness as well. Eat with the many varieties of tortilla chips carried at Amaranth for an easy, refreshing, delicious appetizer!
The first Aquachile hundreds of years ago had nothing to do with seafood or limes! Prior to Columbus, sundried meat would be brought inland to the Sinaloan coast to trade. The meat would be mixed with salt, wild chilis and river water, the meat would be rehydrated and mixed, eaten as an early form of salsa. The dish would be named after its two primary ingredients, water and chilis. Many farmers and labourers today will bring this as a snack into the fields and eat it with a tortilla or a tamale. The word locally actually means a person from the mountains or forest. Forward to the 1970s when the fishing industry began to take off in Sinoloa, raw seafood was also on the rise. Dishes of raw shrimp drowned in lime juice with chilis started to become popular, although some people say local farmers had been eating this for years at this point. No matter the origin of Aquachile, it is cemented in Sinoloan culture and is now the state dish!


Orange Aquachile
Recipe from Tristan Guilbeault
Dietary Restrictions: Pescatarian, nut-free, dairy-free, paleo, gluten-free
Total Time: 45 minutes | (Preparation): 30 minutes | (Cooking): 15 minutes
Yields: 4-6 servings
Ingredients

Aquachile
● 1 lbs Raw Shrimp (we recommend Green Ocean and Aqua Gems)
● 1⁄3 English cucumber, chopped into half slices,
● 1 bunch Cilantro, stems reserved and half the leaves chopped
● 1⁄2 medium Red Onion, julienned
● 6 juicy Limes or Lemons, 3⁄4 cup Lime or Lemon Juice (Earth’s Choice and Santa Cruz Organics)
● 3-4 blood, navel, or valencia Oranges, 2 segmented and 2 juiced
● 2 Jalapenos, sliced
● 2 tsp Salt, or more to taste
Garnish
● red Onion, julienned
● Orange, segments
● Jalapeno, slices
● 1⁄2 Avocado, sliced
● Cilantro, chopped
Sides
● Totopos/Tortilla Chips (we recommend Que Pesa, Paqui, Siete and Maxi Foods)
Instructions
1. Start by thawing the shrimp, add to a bowl and fill with cold water. Once thawed take the tails off the shrimp by pinching and peeling. Cut the shrimp into 3-4 pieces depending on the size and add to a bowl.
2. Juice the limes, cut off the stems from the cilantro and roughly chop 1 jalapeno. Add to a blender with 1 teaspoon salt and blend until smooth. Add to the bowl with the shrimp and mix. Make sure the shrimp is submerged then let “cook” in the fridge for 15 minutes.
3. Now segment and juice the oranges. Cut the top and bottoms off, then begin to cut the peel off, rotating as you cut. Make sure there is no white pith present, then take the orange into your hand and cut using a paring knife between the white lines. Rotate the orange as you go, ensuring not to cut your hand. Do this to two of the oranges and then set the segments aside. Do not discard the centerpiece, they may be juiced as well. Now peel the other two oranges, they may be hand-squeezed or added to a blender and then put through a sieve. Set the orange juice aside.
4. Now cut the vegetables. Clean the skin off the onion and cut the root, then slice into julienne. Cut 1⁄3 of the cucumber, slice in half lengthwise, then cut into slices. Cut the avocado in half, take out the pit, then hold the avocado in hand and cut into slices. Slice the jalapeno into slices. Roughly chop the cilantro. Set all these aside.
5. Now bring everything together, take the shrimp out of the fridge and add the orange juice, 1⁄2 the red onions, 1⁄2 the cucumbers, all the cilantro, 1 tsp salt and mix. Taste and ensure it is properly seasoned. Add to a serving platter or deep plate. Now decorate with all the garnishes. Serve with a side of tortilla chips or on top of tostadas! Enjoy this refreshing appetizer from the coast of Mexico!
Aquachile Tostada - Instructions
For a more personal version of Aquachile, make it into a tostada!
● 1 pack of Tortillas (Amaranth carries many great varieties, use your favourite here)
● Aquachile (Recipe above)
● Aquachile Garnish (Recipe above)
1. To prepare the tostadas there are two ways. Fried or baked. Fry the whole tortillas in 350-degree oil until crispy, then let dry on paper towel. Or the tortillas may be dehydrated in the oven, place them on a sheet pan with parchment paper and cover with another piece of parchment and a sheet pan. Place in a 325 oven for 30 minutes or until crisp.
2. To build the tostadas, begin with slices of avocado on the bottom, add a couple of spoons of fresh Aquachile and garnish with cucumber, oranges, red onion and cilantro. Be creative with it and use the flavours you love!

Raw Seafood
Many types of seafood are at their best in their raw form or just barely cooked. Being landlocked in Alberta hinders us to less variety but does not make it impossible. “Ceviche” is a personal favourite of mine and it describes the process of marinating fish in lime juice. This process does not cook the fish in the traditional sense, the acid denatures the protein present in the fish, similar on a chemical level to what happens when fish is heated through. This makes it safe to eat raw for most people. For people who are hesitant with raw seafood or are pregnant but still want to try this recipe; the shrimp may be added to boiling water to poach for 30 seconds, this eliminates any form of risk present!
SUBSTITUTIONS
This recipe can be made as simple or complex as desired. At its heart, this recipe is shrimp, lime, chili and cilantro. Other vegetables may be added such as celery, zucchini, radish, corn and cabbage. Shrimp may be substituted with scallops or diced white fish such as cod, pollock and sablefish. Tuna may also be used. The limes may be substituted with lemons as well as juice from Santa Cruz Organics and Earth’s Choice. Keep in mind, that fresh is best for this recipe as the nuance of fresh lime and lemon goes away as it oxidizes. The blood oranges I used in this recipe are seasonal from December to May depending on the grower. They may be substituted with any variety of orange or even grapefruit carried at Amaranth.
Aquachile Variations
Aquachile has many regional variations as well as ones from esteemed chefs. Using different flavour profiles and Mexican ingredients I have formulated some of my favourites here:
Tropical Aquachile: Add 1⁄4 cup diced pineapple and tomatoes.
Baja-Aquachile: Halve the shrimp and add 1 diced Pearlmark Ahi Tuna Steak. Add 1 tablespoon soy sauce to the lime mixture, garnish with cucumber, red onion, cilantro, and toasted white sesame seeds. Drizzle with Seven Spice chili oil or Maison Orphee sesame oil.
Aquachile Verde: Add 1⁄2 avocado as well as 1 teaspoon Wizard Organic Worcestershire to the cilantro, lime and jalapeno mix, then blend. Use 8 limes instead of 6 and omit the orange. Drizzle with Seven Spice chili oil or Olive oil. Garnish with breakfast radish, cilantro, cucumber and onion.
Storage
Aquachile will stay good to eat in the fridge for up to three days but is best enjoyed the day of.