
Leche de Tigre / Ceviche Classico with Haskap & Huancina Mac and Cheese with Butternut Squash

By: Tristan Guilbeault
Instagram: @tristangcooks
As we shift into fall and colder weather, the kids return to school and colds are on the rise once again. The theme of the month is immunity, so I was pondering what kind of beverage could I make that is different than the already great products at Amaranth. The answer is a recipe I’ve made over a hundred times! Typically this beverage or sauce is used as a marinade for seafood. But Leche de Tigre is not just for ceviche, it is commonly drank as an aphrodisiac, to cure a hangover or mixed with liquor to make a cocktail; similar to a caesar or bloody mary. Leche de Tigre is Spanish for “milk of the tiger.” No, it is not actually tiger milk, but rather a sauce packed full of antioxidants, anti-inflammatories and antivirals. Commonly coloured yellow or orange from the Peruvian Aji Amarillo; hence the namesake including tiger.
My version is a whitish pink but is packed full of the same vitamins and nutrients, perfect for fighting a cold or just building up your immune system. The combination of celery, onion, ginger, garlic, limes and chili peppers makes for a sour, spicy and umami-filled beverage. Take it as an immunity shot, make a ceviche or mix in some vodka to make a special cocktail.
No one is quite sure of the origin of Leche de Tigre, some say a group of women brought it inland from a neighbouring island. Others say it was simply an extension of the basic ceviche; where fish is marinated in lime and spices for a couple of hours, the resulting liquid is creamy and citrusy. Leche de Tigre followed the same principle but separately from the fish, combining the basic ingredients of the marinade and then adding in less desirable pieces of fish. Blend it all up and you get the national treasure of Peru, so important it is customary to ask for a glass when dining in a Peruvian Restaurant. It is so important to Peruvians in fact that June 28th is National Ceviche Day!


Leche de Tigre
Recipe from Tristan Guilbeault
Dietary restrictions: Gluten-free, dairy-free, lactose-free, pescatarian, paleo, can be made vegan
Total Time: 15 minutes | (Preparation): 15 minutes
Yields: 2 1/2 cups
Ingredients

Leche de Tigre
● 1 cup Water, plus two ice cubes
● 1 cup freshly squeezed Lime or Lemon Juice (around 8-10 citrus), or bottled (we recommend Earth’s Choice, Italian Volcano, Santa Cruz Organics)
● 3⁄4 cup Celery, roughly chopped
● 3⁄4 cup or 1 small Red Onion, roughly chopped
● 1⁄2 cup Ginger, roughly chopped
● 2 cloves Garlic, roughly chopped
● 1⁄4 cup or 1 bunch Cilantro stems
● 2 tsp Heartbeat Hot Sauce Co. Red Habanero Sauce
● 1 tsp Salt
● 4 Scallops and Abductor muscles or fish trim (optional, more details below)
Instructions
1. Make the Leche de Tigre by combining the lime juice, chopped onion, ginger, garlic, cilantro stems, habanero hot sauce, and optional, if you’re using it- scallop and scallop abductors in a bowl. Add 1 teaspoon of salt and mix well, let this mixture stand for 10 minutes so the flavours can meld.
2. Add to a blender with the ice cubes. Blend for 1 minute or until smooth. Put it through a strainer or leave as is. Add it to a glass for an immunity shot or set it in the fridge to make ceviche!
Fruit Juice
The flavour profile of Leche de Tigre lends itself well to mixing with fruits. Think of fruits that have good flavour but aren’t super sweet. Some of my favourites to use in a Leche de Tigre include cantaloupe, honeydew, watermelon, kiwi, gooseberries, papaya, raspberries, persimmon, rhubarb, seabuckthorn berries and even stonefruit; like peaches, nectarines and plums. Add up to 1/2 cup of diced fruit to the Leche de Tigre before blending for a fruitier and more complex flavour. Fruits like melon are more mild in flavour so 1 cup works well in this recipe. Sweeter more tart fruits such as raspberries, blackberries, kiwis and gooseberries only add 1⁄4 cup to this recipe. For tropical fruits like papaya or mango and stonefruits such as peach, nectarine and plum, add 1⁄2 cup.
Fish trim
The “Leche” in Leche de Tigre is named so because of the milk-like consistency of this sauce. Typically chefs in Peru receive fresh fish caught early in the morning, the fish is broken down and used immediately, while the scraps are used for fish stock as well as the Leche de Tigre. This no-waste approach is not only better for the environment but also for the quality of the ceviche.
Health Benefits
Leche de Tigre has many health benefits and contains a variety of nutrient-rich ingredients. The enzymes from the fish and the acidity of the lime juice help aid in digestion. Lime juice is also high in vitamin C, boosting immunity and helping the body fight off colds through better absorption of essential nutrients and minerals. Incorporating Leche de Tigre into your diet may contribute to better digestion and overall well-being.
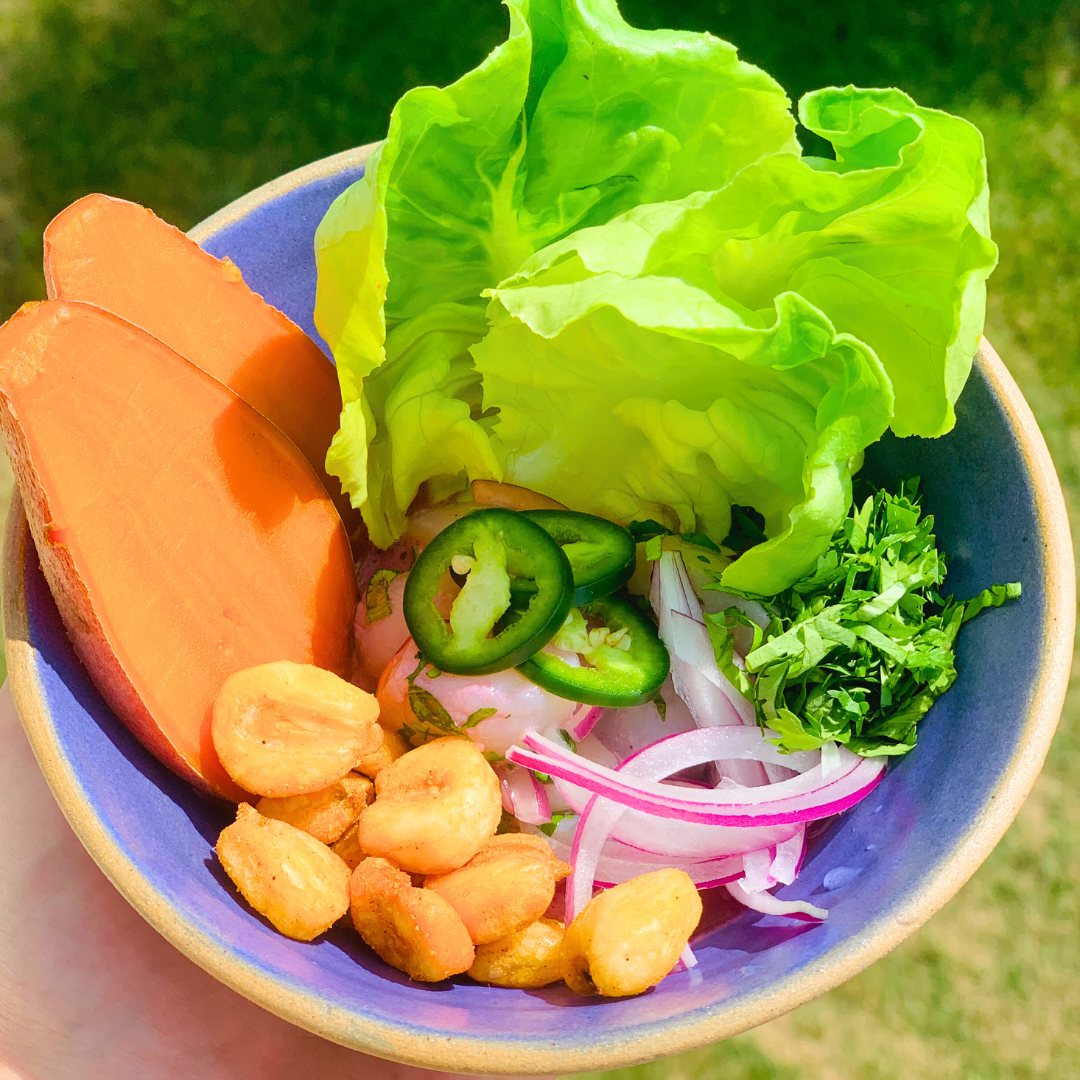
This is my take on the classic ceviche using Amaranth ingredients. Using the Leche de Tigre we have made above, I have added haskap berries for their tartness, honey-like sweetness, and beautiful colour. The classic ceviche uses Leche de Tigre, some sort of lean white fish like sole or cod as well as fresh cilantro and onion. In my version, I will be using beautiful Atlantic scallops and pairing them with traditional sides like boiled sweet potatoes, inca corn and butterleaf lettuce. This dish is perfect for an appetizer or a simple light lunch, it is very good for digestion and gut health!


Ceviche Classico with Haskap
Recipe from Tristan Guilbeault
Dietary restrictions: Gluten-free, dairy-free, lactose-free, nut-free, pescatarian & paleo
Total Time: 20 minutes | (Preparation): 10 minutes | (Cooking): 10 minutes
Feeds: 2-4 people
Ingredients
Ceviche Classico
● 1 bag of Clearwater Scallops
● 1 cup Leche de Tigre (see the recipe above)
● 1 tbsp Rosy Farms Haskap Berries, fresh, frozen or juiced
Boiled Sweet Potato
● 3-4 small Sweet Potato (around 0.75lbs) cut into medallions
● 1 piece Star Anise
● 1 tbsp Cane Sugar
● 2 tsp Salt
● Water to cover
Garnish
● Butterleaf Lettuce or similar, washed and torn into individual “cups”
● 1⁄4 Red Onion, julienned
● 2 tbsp Cilantro, chopped
● Inka Crops Inka Corn kernels
● 1 Jalapeno, cut into thin slices (optional)
Instructions
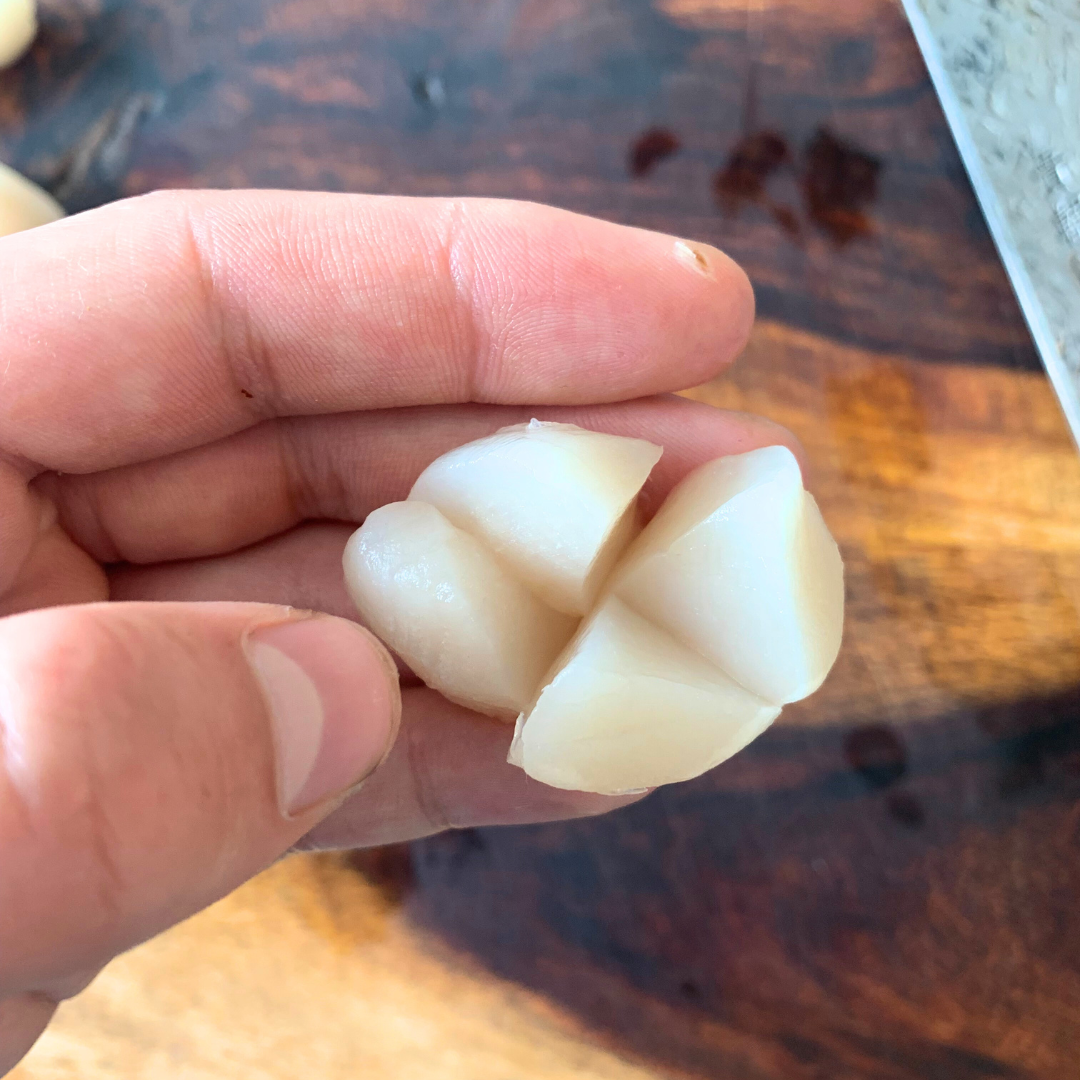
1. Begin the ceviche by thawing and prepping the scallops. Take them out of the bag and place them onto paper towels to dry. You will notice they have an abductor muscle on each side, this is what connects them to their shell. Pull the muscle off each scallop and set aside. These may be used in the Leche de Tigre above.
2. For the Leche de Tigre, follow the steps above but this time add in fresh or frozen haskap berries. Blend and strain. Set aside.
3. Boil the sweet potato. Cut into medallions roughly the same thickness as your fingers, add to a small pot along with the star anise, salt, sugar and water. Bring to a boil over high heat then reduce to a simmer. Cook for 10 minutes or until the potato is tender. Drain and then let cool.
4. Cut the red onion julienne, roughly chop the cilantro, tear off pieces of lettuce to make little cups (make sure to wash them). Set all aside.
5. Make the ceviche by cutting the scallops into 4 and adding them to a bowl. Season with a good pinch of salt and add the Leche de Tigre. Mix together and let sit for five minutes. Add in half the onions and cilantro and mix again. Spoon gently into the middle of a bowl and top with the rest of the julienned onion and cilantro. Add the Incan corn kernels, sweet potato and lettuce cups around the ceviche. Finally, garnish with the sliced jalapeno and serve! Use the lettuce cups to scoop up the scallop ceviche, add a piece of sweet potato and some corn and enjoy this beautiful fresh dish any time of the year!
Ceviche
I wanted to include a blurb simply about ceviche and how it differs. There are thousands of variations of ceviche, some I have already done recipes for, e.g. aquachile and tiradito. Both are very good, but very different, in fact, it is kind of difficult to see the similarities besides lime juice and seafood. Ceviche with Leche de Tigre is the best and the “real” ceviche. The sauce provides so much flavour to an otherwise basic dish and is so healthy. Combined with a tart berry like haskap, it makes for an even more complex and aesthetically pleasing sauce. Add some sweet potatoes, corn nuts and lettuce for a healthy, yet traditional appetizer or lunch. I enjoy sharing ceviche because it is a dish that is just not popular here, but a dish I feel people will be happy they discovered!
Substitutions
Sealove Wild Pacific cod or Wild Sockeye Salmon may be used instead of the scallops in this recipe. Simply dice them and then save any odd-shaped pieces for the Leche de Tigre.

Storage
Leche de Tigre will last 3-5 days in the fridge but is best made and enjoyed fresh. The scallop ceviche will last in the fridge for up to three days but is best enjoyed the day of. Boiled sweet potatoes may last up to 5 days in the fridge.
Tips
When blending the ice cubes are added to keep the mixture cool so that fish scraps will help emulsify the sauce. If the sauce ends up quite foamy that means you did it right! When straining the sauce, cheesecloth is optional but it will help you fully squeeze all the juice out as well as end up with a clear sauce. When seasoning the ceviche make sure to taste, taste, taste; the difference between a bad ceviche and a good one is salt. Funny for a dish made of seafood right? Well, it might take more salt initially than you think, so don’t be shy. All the flavours should be there in some form but the dish should not taste overly salty. You will know what I mean when you make it.
September is the month of back-to-school for kids, which can be stressful for parents. I wanted to create a recipe that could be easily enjoyed by parents and kids alike and be crave-able, gluten-free and vegetarian. Easy to make ahead of time and reheat throughout the week, bring to school to warm up, enjoy when the kids get home or as an easy casserole-style dinner. This Huancina Mac and Cheese is creamy and delicious without a fussy bechamel sauce. Using all Amaranth ingredients, this recipe comes together in less than an hour and is so satisfying and delicious!
This recipe is inspired by the flavour profile of Peruvian Huancina sauce, traditionally served with boiled potatoes and garnished with hard-boiled eggs and olives. I like to call it spicy nacho cheese sauce, it is reminiscent of stadium or theatre nachos with a good kick of chilli. Even for people who don’t like spice, the sauce can be addicting! The original recipe consists of cream cheese, evaporated milk, onions, garlic, saltines and aji amarillo chilis which gives it that nacho-cheese-style look. In my version the spice is optional but the butternut squash still gives it the same beautiful colour. Paired with Rummo Maccheroncelli pasta, Vital Greens Farms cream cheese, Paneriso rice breadcrumbs, L’Ancêtre marble cheddar and a small amount of Heartbeat hot sauce. The result is a creamy and delicious pasta dish perfect for any day of the week!


Huancina Mac and Cheese with Butternut Squash
Recipe from Tristan Guilbeault
Dietary Restrictions: Gluten-free, vegetarian, can be made vegan
Total Time: 55 minutes | (Preparation): 5 minutes | (Cooking): 50 minutes
Feeds: 4-5 people
Ingredients

“Huancina” Butternut Sauce
● 1 Butternut Squash, around 1.5lbs
● 1 medium White Onion, julienned
● 3 cloves Garlic, roughly chopped
● 1 pkg Vital Greens Farm Cream Cheese
● 1 cup shredded L’Ancêtre Marble Cheddar
● 1/8th cup Neutral Oil (we recommend Spectrum refined Canola Oil, Maison Orphee Grapeseed Oil, Chosen Foods and Primal Kitchen Avocado Oil)
● 2-3 tsp Heartbeat Hot Sauce Co. Red Habanero Sauce
Pasta
● 1 pkg Rummo #7 Gluten-free Maccheroncelli
● Water to cover
● 1 tbsp Salt
Breadcrumb Topping
● 1⁄4 cup Paneriso Rice Breadcrumbs
● 1⁄2 cup shredded L’Ancêtre Marble Cheddar
Garnish
● Fresh Chives, finely chopped
Instructions
1. Preheat the oven to 425 degrees. Take the butternut and trim the top and bottom, slice in half, using a spoon take out the seeds and discard. Place a piece of parchment onto a sheet tray and add the butternut squash, season liberally with oil, salt and pepper then flip over and repeat. Place cut side down on the tray, cover with aluminum foil and bake for 30 minutes or until tender. Keep the oven on.
2. Boil the pasta. Boil according to package instructions but ensure to undercook the pasta by 1-2 minutes. It should be quite al dente because we are going to bake it. Once cooked, reserve 1 cup of the cooking liquid and drain the pasta. Set both aside.
3. To make the Huancina sauce, begin by chopping the onion julienne and mincing the garlic. Add 1/8th cup oil to a medium-sized pot on medium heat. Add the alliums and season with a pinch of salt. Stir around so the garlic does not burn, saute until the onions have softened and gained some colour around the edges, 6-7 minutes. When the squash is cooked take out the oven and let cool. Using a spoon take out the meat and add to the fried onions, add 2 or 3 teaspoons of Habanero sauce (depending on how spicy you prefer, I used 3), the cream cheese and reserved pasta liquid, reduce heat to low. Stir for 2-3 more minutes until combined. Add to a blender or use a hand blender to smoothen the sauce.
4. Add the sauce back into the pan if using a blender then add the pasta and grated cheddar cheese, mix for 30 seconds until the cheese is creamy and gooey, this is also a good stage to taste for seasoning (pepper is optional). Add into a casserole dish and sprinkle over the remaining cheddar cheese and breadcrumbs.
5. Bake at 425 for 15 minutes, or until breadcrumbs are nice and crispy and the cheese is gooey. Sprinkle on fresh chives and enjoy this delicious comfort food that both kids and adults will love!
vegan
Originally when I was brainstorming this dish it was a way to make a mac and cheese vegan. But then, I stumbled and thought how could I make something with cheese in the name vegan? So I retraced my steps and came up with the version seen here, but that doesn’t mean that the vegan version couldn’t be good. Substitute vegan cream cheese over regular cream cheese and omit the cheddar, add a couple of tablespoons of nutritional yeast instead for its cheesy umami flavour. Top off with your favourite vegan-style cheese, Amaranth has great options like Nafsikas Garden Vegan Smoked Gouda, Parmela Creamery Aged Nutcheese Mozzarella Style Shred, Daiya Dairy Free Cheddar Cheese Shreds and more depending on location.
pasta SUBSTitutions
I used macheroncelli pasta because it is a ‘traditional’ macaroni shaped pasta from Italy. However, Amaranth carries many other great gluten-free as well as standard options. Gluten-free varieties include; Rummo Gluten-free Rigatoni and Elicoidali, Jovial Gluten-free Brown Rice Fusili, Penne, Cassava Penne and Cassava Elbows, Tinkyada Pasta Joy Organic Brown Rice Pasta Spirals, Elbows and Shells, GoGo Quinoa Fusili and Macaroni. Standard gluten options include; Rummo Organic Whole Wheat Fusili, Kaslo Sourdough Classic Radiatore Semolina Pasta, Macaro and Elbow Macaroni, Bioitalia Fusili Pasta and Penne Rigate Durum Wheat Semolina Pasta, Farm Conchiglie Pasta shells, Organic Matters Organic Sorghum Pasta. There are honestly so many different great pasta options that are usable for this recipe. I chose the macheroncelli because the tubes and the ridges on the outside would hold the sauce well, I also had never heard of them and wanted to try. So pick your favourite or one you’ve never heard of, they will all taste great used in this recipe!


tips
When prepping the butternut squash, use the weight of the blade to cut it in half; do not force it. When taking out the seeds, scoop the first layer of the flesh to get out the stringy part of the seeds. The skin of the squash may be poked with a fork or the tip of a knife on the skin side for faster more even cooking. Some components of this dish can be made ahead for even easier execution. Roast the squash ahead and take out the meat, then it may be stored in the fridge for up to one week or frozen for up to 6 months. The pasta may be boiled, drained and tossed with a small amount of oil, then kept in the fridge for up to 5 days. When ready to proceed with the recipe, make the sauce, toss in the pasta and add to the oven. It's that easy!
Reheating
This recipe works well for a school or work lunch because it is very easy to reheat. It may be warmed up on the stovetop or in the oven, in the oven add to an ovenproof pie plate or baking dish and bake at 350 degrees for 15-20 minutes until warmed through and the cheese is gooey. On the stove; set on medium-low heat and let warm through around 10-15 minutes, watching so that it doesn’t get too hot and burn. It can also be warmed up in the microwave for 45-60 seconds depending on the size of the piece.